Posted on

Maximizing Your Studio Space: Tips for Creating an Efficient Production Environment

Creating an efficient and inspiring production environment is crucial for any music producer or recording artist. A well-organized studio can enhance your workflow, reduce stress, and help you stay focused on your creative process. Whether you’re working in a small home studio or a larger professional space, optimizing your studio setup can make a significant difference. Here are some practical tips for maximizing your studio space and creating an efficient production environment.

1. Plan Your Layout

Before diving into the setup, take the time to plan your studio layout. Consider the following:

  • Work Zones: Define distinct areas for different tasks, such as mixing, recording, and editing. Position your desk, monitors, and keyboard in a way that promotes a smooth workflow.
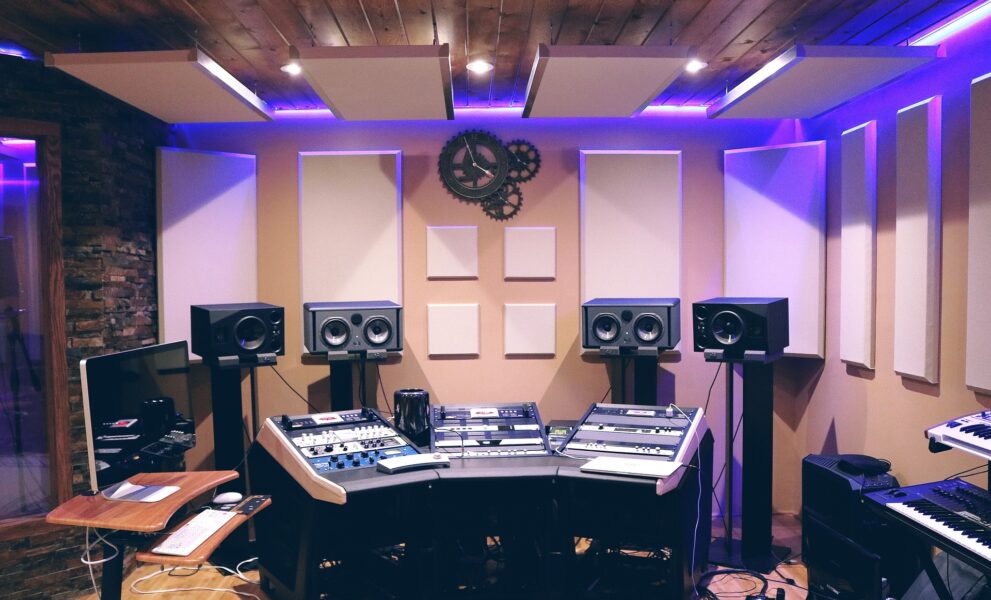
  • Acoustic Treatment: Arrange your acoustic panels and bass traps to optimize sound quality. Typically, placing panels at the first reflection points and in the corners can help minimize unwanted reflections and improve your mix accuracy.
  • Cable Management: Plan how you’ll route cables to avoid clutter and ensure easy access to all your gear. Cable management solutions like cable ties, racks, or under-desk trays can keep your workspace tidy.

2. Optimize Your Desk Setup

Your desk is the command center of your studio. To make the most of it:

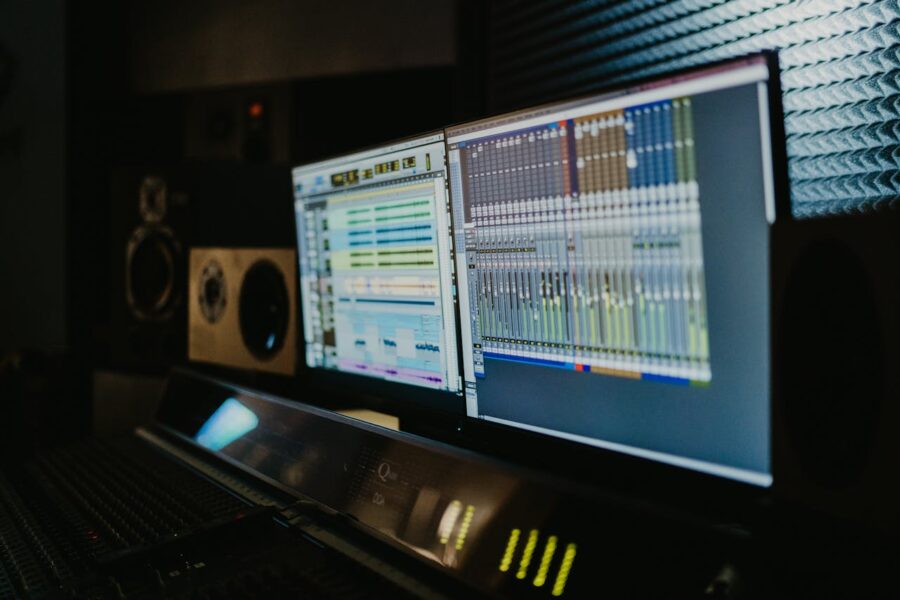
  • Monitor Placement: Position your studio monitors at ear level and form an equilateral triangle with your listening position. This setup helps achieve accurate sound reproduction.
  • Ergonomic Considerations: Ensure your chair, desk height, and monitor angles are adjusted for comfortable posture and reduced strain during long sessions.
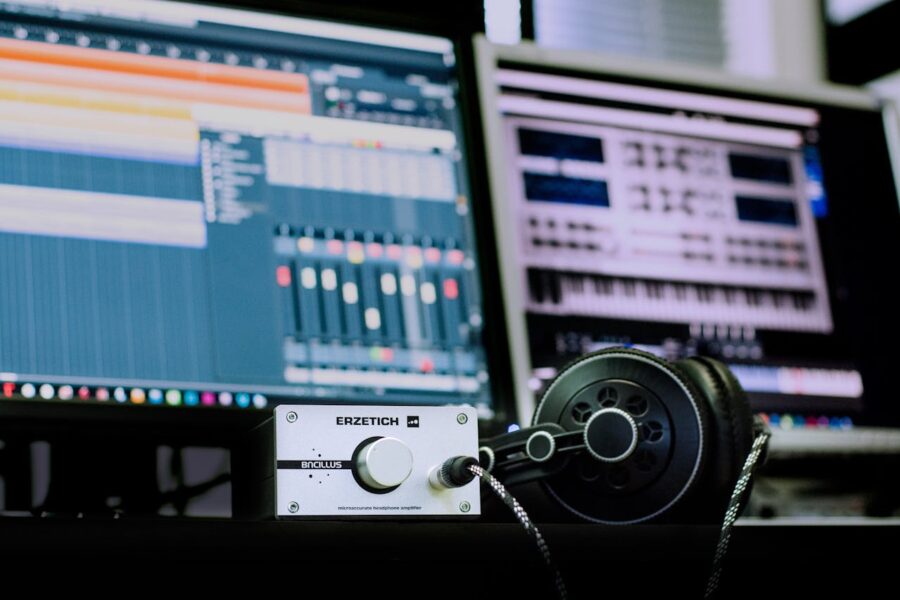
  • Essential Gear: Keep frequently used equipment like your MIDI keyboard, audio interface, and control surfaces within easy reach. Consider using a desk with built-in storage or a separate rack for gear.

3. Make Use of Vertical Space

In smaller studios, utilizing vertical space can free up valuable surface area:

  • Shelving Units: Install shelves or wall-mounted racks to store books, gear, and other equipment. This keeps your desk clear and organized.
  • Wall-Mounted Accessories: Use wall-mounted racks for headphones, cables, and other accessories. This can help reduce clutter and make it easier to find what you need.

4. Invest in Quality Acoustic Treatment

Good acoustic treatment is essential for accurate monitoring and mixing:

  • Absorption Panels: Install acoustic panels to absorb sound and reduce reflections. Focus on areas like the first reflection points, behind your monitors, and in the corners.
  • Bass Traps: Place bass traps in the corners of your studio to manage low-frequency buildup and achieve a more balanced sound.

5. Create a Comfortable Atmosphere

A comfortable and inspiring environment can enhance your creativity:

  • Lighting: Use adjustable lighting to create a relaxed atmosphere. Consider LED lights with color temperature control to match your mood and time of day.
  • Personal Touches: Add elements that inspire you, such as artwork, plants, or personal memorabilia. A pleasant environment can boost your motivation and focus.

6. Maintain Regular Organization

Keeping your studio organized is an ongoing process:

  • Routine Clean-Up: Regularly clean and declutter your workspace. Remove unused equipment and tidy up cables to maintain an efficient environment.
  • Labeling: Label cables, equipment, and storage areas to quickly locate items and avoid confusion during sessions.

7. Invest in Quality Furniture

Good quality furniture can make a significant difference:

  • Sturdy Desk: Invest in a robust desk that can support your equipment and withstand daily use.
  • Adjustable Chair: Choose an ergonomic chair with adjustable height, backrest, and armrests to ensure comfort during long sessions.

8. Optimize Your Acoustic Setup

Ensure your studio’s acoustic environment is tailored to your needs:

  • Room Size and Shape: If possible, choose a room with a balanced shape and avoid overly reflective surfaces. Irregularly shaped rooms can help diffuse sound.
  • Speaker Placement: Experiment with speaker placement to find the optimal position for accurate monitoring. Small adjustments can have a significant impact on your listening experience.

By following these tips, you can transform your studio space into an efficient, organized, and inspiring environment that enhances your productivity and creativity. Whether you’re setting up a new studio or looking to improve your current setup, taking the time to optimize your space will pay off in the quality of your work and your overall studio experience.

Posted on

An Audio Interface for your Home Studio?

Starting a home music studio is a dream for many aspiring musicians and producers. One of the key components in this setup is the audio interface. Understanding what an audio interface is and how it functions can significantly enhance your recording and production capabilities. This article will explore the concept of an audio interface, its various features, and how you can use it to set up and run your own home music studio.

What is an Audio Interface?

An audio interface is a device that connects your musical instruments and microphones to your computer. It converts analog signals (like your voice or the sound from a guitar) into digital signals that your computer can process, and vice versa. This conversion process is crucial for recording, editing, and producing music digitally.

Audio interfaces come in various shapes and sizes, from compact portable units to larger, more complex devices with multiple inputs and outputs. They typically connect to your computer via USB, Thunderbolt, or FireWire, depending on the model and your computer’s available ports.

Key Features of an Audio Interface

  1. Inputs and Outputs (I/O): The number of inputs and outputs determines how many instruments or microphones you can connect simultaneously. For a simple home studio, 2-4 inputs are usually sufficient, while more advanced setups may require additional I/O.
  2. Preamps: High-quality preamps are essential for capturing clean and clear audio. They amplify the weak signals from microphones to a level suitable for recording. Many audio interfaces come with built-in preamps, but the quality can vary.
  3. Phantom Power: This feature is necessary for using condenser microphones, which require external power to operate. Most audio interfaces provide phantom power (typically 48V) to accommodate these mics.
  4. Digital Conversion Quality: The bit depth and sample rate of the digital converters in your audio interface affect the quality of your recordings. Higher bit depths and sample rates result in more detailed and accurate recordings.
  5. Latency: Latency refers to the delay between inputting a sound and hearing it through your computer’s speakers. Lower latency is crucial for real-time monitoring and recording, ensuring that there are no noticeable delays that can disrupt the performance.
  6. Monitoring: Most audio interfaces offer headphone outputs and monitor control, allowing you to listen to your recordings in real time. Some models also include direct monitoring, which lets you hear the input signal before it passes through your computer, reducing latency.

How to Use an Audio Interface to Record Music

  1. Setup and Connection: Start by connecting your audio interface to your computer using the appropriate cable (USB, Thunderbolt, or FireWire). Install any necessary drivers or software provided by the manufacturer to ensure proper functionality.
  2. Connecting Instruments and Microphones: Plug your instruments and microphones into the inputs on the audio interface. If you’re using a condenser microphone, make sure to activate the phantom power.
  3. Configuring Your DAW: Open your digital audio workstation (DAW) and configure the audio settings to recognize your audio interface. Set the interface as the input and output device in your DAW’s audio preferences.
  4. Setting Levels: Adjust the gain levels on the audio interface to ensure a strong signal without clipping (distortion). Most interfaces have LED indicators to help you monitor the input levels.
  5. Recording: Create a new track in your DAW and select the appropriate input source. Arm the track for recording and press the record button. Play your instrument or sing into the microphone, and the audio will be captured by your DAW.
  6. Monitoring: Use headphones or studio monitors connected to the audio interface to listen to your recordings. Adjust the monitoring levels as needed for comfortable listening.

Setting Up Your Home Music Studio

  1. Choosing the Right Space: Select a quiet and acoustically treated room for your studio. Avoid rooms with excessive background noise or reflective surfaces that can interfere with your recordings.
  2. Essential Equipment:
    • Computer: A reliable computer with sufficient processing power and storage is crucial for running your DAW and handling large audio files.
    • DAW Software: Choose a DAW that suits your workflow and production needs. Popular options include Ableton Live, Logic Pro, Pro Tools, and FL Studio.
    • Audio Interface: As discussed, the audio interface is the heart of your recording setup. Choose one that meets your input/output needs and budget.
    • Microphones: Invest in a good quality condenser microphone for vocals and a dynamic microphone for instruments.
    • Headphones and Monitors: High-quality headphones and studio monitors are essential for accurate monitoring and mixing.
    • MIDI Controller: A MIDI keyboard or controller can enhance your workflow, allowing you to input notes and control virtual instruments.
  3. Acoustic Treatment: Improve the sound quality of your recordings by adding acoustic panels, bass traps, and diffusers to your studio space. This will help reduce reflections and absorb unwanted frequencies.
  4. Organization and Workflow: Arrange your equipment ergonomically to ensure a smooth workflow. Keep cables organized and easily accessible, and create a comfortable environment that encourages creativity.
  5. Learning and Experimentation: Take the time to learn your DAW and audio interface inside out. Experiment with different recording techniques, microphone placements, and mixing methods to develop your unique sound.

Conclusion

An audio interface is an indispensable tool for anyone looking to record music and start a home studio. It bridges the gap between your instruments and your computer, enabling high-quality digital recording and production. By understanding the features and functions of an audio interface, you can make informed decisions when setting up your home studio. Combine this knowledge with essential equipment, acoustic treatment, and a passion for music, and you’ll be well on your way to creating professional-quality recordings from the comfort of your home. Dive into the world of audio interfaces and home recording, and let your musical journey begin!

Posted on

Why Use Music Loops in Your Productions?

Music loops have revolutionized the way producers create tracks, providing a versatile and efficient tool for enhancing music production. Whether you’re a seasoned producer or a beginner, understanding how to effectively use loops can significantly elevate your music-making process. This article delves into the practicalities and creative potential of using music loops to enhance your music.

What Are Music Loops?

Music loops are short, repeating sections of music that can be seamlessly integrated into your tracks. As the name suggests, they are typically a small section of music that can be looped over and over again as needed. They can encompass a variety of elements, such as drum rhythms, fills, bass lines, sax melodies, guitar riffs and rhythms, orchestral productions, world instrument riffs, and vocals. Loops are available in every imaginable genre and in a range of keys and bpms, allowing you to mix and match when using them in your productions.

Most modern DAWS (Digital Audio Workstations) will let you drag and drop loops directly into your workflow, allowing you to quickly and easily integrate loops into your tracks.

Music loops have revolutionized the way producers create tracks, providing a versatile and efficient tool for enhancing music production. Whether you’re a seasoned producer or a beginner, understanding how to effectively use loops can significantly elevate your music-making process. This article delves into the practicalities and creative potential of using music loops to enhance your music.

Benefits of Using Music Loops

  1. Time Efficiency: One of the most significant advantages of using loops is the time they save. Instead of creating every element from scratch, loops allow you to quickly build the foundation of your track. This is particularly beneficial for producers working under tight deadlines or those who want to maximize their creative output.
  2. Consistency: Loops ensure a consistent sound throughout your track. This is particularly useful for genres that rely on repetitive patterns, like electronic dance music (EDM) or hip-hop. Consistency in rhythm and melody helps maintain a cohesive sound, making the production process smoother and more streamlined.
  3. Inspiration: Loops can serve as a great source of inspiration. Hearing a catchy melody or a groovy drum beat can spark ideas and help overcome writer’s block. For many producers, experimenting with different loops can lead to unexpected creative breakthroughs and new musical directions.
  4. Professional Sound: High-quality loops are often produced by professional musicians and sound designers, giving your tracks a polished and professional sound. This is especially useful for independent or home studio producers who may not have access to high-end recording equipment or session musicians.
  5. Versatility: Loops can be used in various stages of production, from initial composition to final arrangement. They can be the primary building blocks of a track or serve as supplementary elements that enhance existing parts. This versatility allows producers to experiment and find the best way to integrate loops into their music.

Creative Uses of Music Loops

  1. Remixing: Loops are perfect for remixing existing tracks. By incorporating loops, you can easily reimagine a song in a different style or genre. This can be a fun and creative way to put your spin on a track while learning new production techniques.
  2. Live Performance: DJs and live performers can use loops to build and manipulate tracks in real-time, adding a dynamic element to their performances. Live looping allows for spontaneous creativity and can make performances more engaging for the audience.
  3. Sound Design for Multimedia: Loops aren’t limited to music production. They can be used in sound design for films, video games, and other multimedia projects, providing a quick way to create atmospheric backgrounds and effects. The ability to quickly generate consistent soundscapes makes loops invaluable in these contexts.
  4. Collaboration: Sharing loops with other producers can foster collaboration. By exchanging loops, you can build upon each other’s ideas and create something truly unique. Collaborative projects can lead to new insights and techniques that enhance your production skills.
  5. Educational Tools: For beginners, loops can serve as educational tools. By dissecting and analyzing loops, novice producers can learn about different aspects of music production, such as arrangement, sound design, and mixing. This hands-on learning approach can accelerate the learning process and build confidence.

Conclusion

Music loops are a powerful tool in the modern producer’s arsenal. They offer a blend of efficiency, inspiration, and professional quality that can significantly enhance your music production process. By understanding how to effectively use and manipulate loops, you can unlock new creative possibilities and take your tracks to the next level. Whether you’re looking to save time, overcome creative blocks, or add a professional touch to your music, incorporating loops into your workflow is a game-changer. So, dive into the world of music loops and let your creativity flow!